Welcome Back, Selenium IDE!

I was browsing my Feedly news feed recently, as I routinely do once a week, and saw this particular bit of cheery bulletin:

Click to redirect to the official announcement from Selenium HQ

Long live Selenium IDE! 🙂

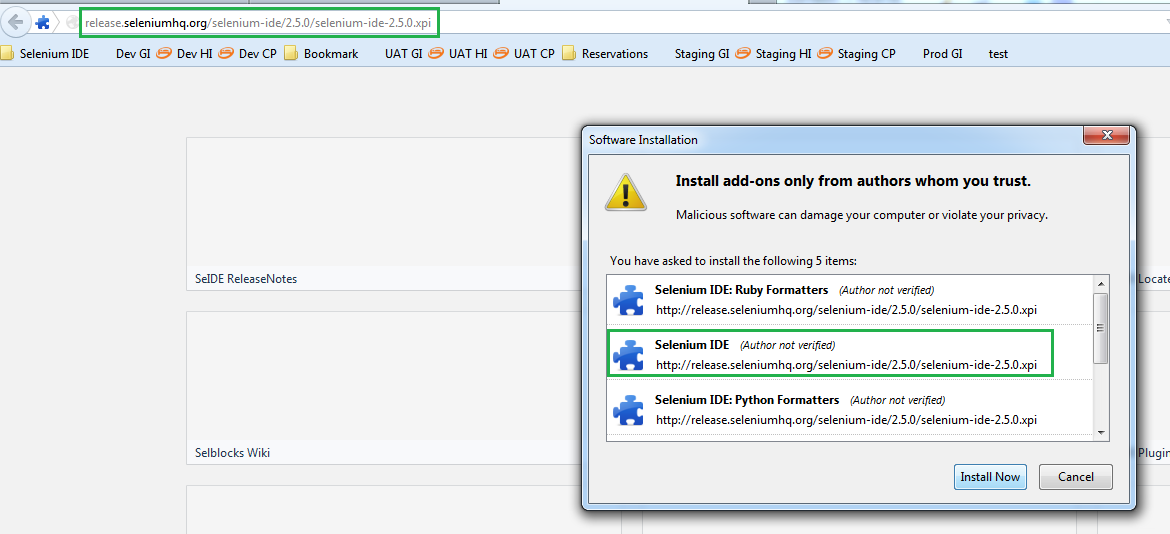
Nostalgia hits. I remember the days when the only automation I knew was Selenium IDE’s record-and-playback. It’s easy to install, is relatively fast, and isn’t difficult to pick up as the Selenese commands are straightforward. It was possible to run a test individually as well as to run tests as a suite. There was a way to manually change test steps, and, of course, save tests, as needed. It only worked on Firefox at the time, but that for me back then was good enough. At least until I eventually craved for the re-usability, maintenance, and customization advantages that programming has over record-and-playback.

This is what it looks like now:

And some delightful things about it (that I don’t remember – or perhaps forgot – having seen in the Legacy IDE):

  • Command dropdown options in English
  • Control flow commands baked in
  • An execute async script command
  • A run command to run tests headlessly! 😮
  • Google Chrome extension and Firefox add-on versions out of the box

Although I don’t see myself going back to record-and-playback tools for my automation needs, I’m still glad Selenium IDE is back for everyone to try. It’s still a great tool for recording quick automated browser scripts, for demo purposes or otherwise, as well as for learning automation in general.

How to Check Actual Values of Stored Variables in a Selenium IDE Test

Automated test scripts often revolve around targeting a certain page element and checking whether it’s value is correct, according to what is expected (based on business rules). Below is a simple test, here I am trying to check whether the highlighted text displayed in Gmail’s login page (‘Sign in to continue to Gmail’) is correct

GoogleTest1

This is the format I usually follow in writing verification/assertion tests

In the example, I stored the actual and expected text values in separate variables, different names from each other, because I may end up using them in other test cases. This way, I can also write the verify (or assert) statement in a simple to understand manner, by using a comparison statement, storedVars[‘variable1’] == storedVars[‘variable2’], which just means that I am comparing the correct value (variable1) to the retrieved page element value (variable2).

And then I run the test.

GoogleTest2

..which do not always end up working properly, as seen in the above screenshot. Why did my test fail? How come the verify statement is highlighted red? As far as I can see, the correct value that I stored in variable1 has the same value as the one being displayed in the page. So why is there an error in my test?

Let’s see if the Stored-Vars tab in the Selenium IDE can give us a hint.

GoogleTest3

Oh! Now I see what’s causing the error! It seems that the expected value stored in variable1 has an extra space in the end. Maybe I accidentally added an extra space while typing. Silly me. 😀

Let’s remove that space and run the test again, shall we?

GoogleTest4

That’s better. Our verify statement is now highlighted green. 🙂

Of course, if an error occurs in the test script and there is nothing wrong in the expected value, it means that there is a problem with the actual value being retrieved from the page. You can see that using the same Stored-Vars tab in the IDE.

P.S. The Stored-Vars tab does not come together with the basic installed Selenium IDE. It is a plugin, created by Samit Badle and can be downloaded from the following link: Stored Variables Viewer (Selenium IDE) by Samit Badle

Happy testing! :3

Selenium IDE Commonly Used Commands (Part 3)

We’ve already studied how several types of store can be useful in Selenium IDE automated testing, as well as other commands like clicktype, open, or select. This time around, to wrap up the list of commonly used commands, let’s see how different kinds of verify form the checkpoints in our tests.

Note: verify commands have the same function as their assert counterparts. Their only difference is that verify commands allow the test to run the next command even if the verification test fails, while assert commands stop then and there.

  • verifyText. If we want to check the correctness of text copies displayed on a page, we can use the verifyText command. We just need to target the element location of the copy and then add the pattern to which the copy will be compared with.

Selenium IDE lights up with colors when running verification (or assertion) tests: green for a successful test and ..

verifyText-1

red for a failed test. In our failed test example below, you may notice that the pattern in the test and the copy displayed in the page do not match.

verifyText-2

  • verifyEval. We can run verification checks on texts/copies using the verifyEval command too, though this means that our test will have more lines because the pattern to which the copy will be compared is not written together with the verifyEval command. In its place is either a ‘true’ or ‘false’ result value, which will be compared to the result of the check that happens inside the target column. In our example, you may notice that the copy’s target location is not specified together with the verifyEval command as well. This means that there are often three lines of commands in order to verify if a copy on a page is correct.

The verifyEval command is more useful when running computations though, often involving javascript objects and operations.

verifyEval

  • verifyElementPresent. Sometimes we want to check whether a particular element is on a page or not. To do that, we use the verifyElementPresent command.

If the element is there, even if it is hidden or disabled, Selenium will tell us that the test is successful.

verifyElementPresent-1

On the other hand, our test will fail if the element we are checking is not to be found anywhere in the page.

verifyElementPresent-2

Note: There is also a verifyElementNotPresent command, which does the opposite of the verifyElementPresent command.

  • verifyVisible. We can also test if an element is visibly shown in a page or not by using the verifyVisible command. It behaves similarly to the verifyElementPresent command except that tests will fail if the element we are checking is in the page but hidden, like how popups are invisible unless a particular action happens. See example screenshots for successful and failed tests below.

verifyVisible-1

verifyVisible-2

Selenium IDE Commonly Used Commands (Part 2)

Last month, I’ve shared eight Selenium IDE commands that are often used in automated tests. Today, let’s add a few more to that list and learn several types of store.

  • store. Testing an application involves running a good number of different scenarios which checks some information over and over again to make sure they continue to be displayed correctly. This means we need to write these information more than once and edit them one by one when the requirements have changed. That can be tiring for someone who is already maintaining lots of tests. In order to debug tests easier and faster, it is good practice to create variables which we can reuse anywhere. This is how useful the store command is. In the example below, we are creating a variable called ‘companyName’ and storing a text value of ‘DirectWithHotels’ to it. To use the variable in our tests, we just call it by using ${variableName} (the sample command echo ${companyName} thus shows us a result of ‘DirectWithHotels’).

store

  • storeText. Often the values we want to store in variables and manipulate are found in pages themselves, most of them are text or copies. We use storeText to retrieve them on their exact page locations. In our example below, we are trying to get the ‘Due Now – Prepayment’ amount being displayed in the page.

storeText

  • storeValue. For some web applications, storeText does not properly retrieve the information we see on the page, even if we specify the correct element location. For such occasions, try using storeValue. In the sample screenshot below, we are trying to get the ‘Total room cost’ value. storeText returned us a null value while storeValue retrieves the correct information.

storeValue

  • storeAttribute. Some information are not displayed on the page as text but rather are embedded into elements are attributes. Image alternate texts or source is one example. Element style data is another. These information can be retrieved using the storeAttribute command.

storeAttribute

  • storeEval. For computations or manipulations involving variables or pre-defined javascript objects or methods, the storeEval command is handy. In the example below, I wanted to get the current date (at the time of test) by storing the result of the javascript Date object and store it in a variable called ‘checkinDate’.

storeEval

Selenium IDE Commonly Used Commands (Part 1)

Selenium IDE cater to a huge list of commands for automated testing and I have yet to master all of them. After a year of experience with the Firefox plugin, I’ve only used about twenty or so, repeatedly. Here are some of them:

  • open. We always open a webpage to start an automated test case and open is the command to redirect the test to that desired page.

open

  • pause. Often there are sections in a test case where we do not want to proceed immediately command by command, either because the test needs to wait for some hidden element to appear first or because we like to see how the page is being tested ourselves, slowly. There is a speed slider in Selenium but I prefer to use pause since that way I won’t have to set up the speed of my saved test cases when I reuse them.

pause

  • click. There will always be links and buttons that needs clicking.

click

  • clickAndWait. When clicking a link or a button redirects the test to a new page, clickAndWait is better than using click because it forces the test to wait for the new page to load first rather than executing the next command immediately. The waiting time is, of course, limited to the default timeout value.

clickAndWait

  • setTimeout. If automated tests fail because of the default timeout for reasons like the server running slow on a particular day, increasing the default timeout value using setTimeout helps.

setTimeout

  • type. As there will be links and buttons that need clicking, there are often input boxes that needs filling, especially for e-commerce sites.

type

  • select. Sometimes there are options that needs selecting instead of text boxes to type on.

select

  • goBack. And when you need to go back one page in history, goBack will be useful.

goBack


Using CSS Selectors to Target Webpage Elements (Part 2)

Some webpage elements can be tricky to locate, especially when they do not have id or name attributes. For such cases, testers can combine CSS selectors.

Let’s look at one example below. Using Firebug, inspecting the value of the PAYABLE AT THE HOTEL – BALANCE field in the page show us its location.

Step3balanceCSS

As displayed, the element tell us that it is a table data (hence td) that has a right-label class and some style:

td class=”right-label” style=”width: 30%; padding-top: 7px;”
PHP 2,559.78
/td

Which we can try to target in the following three ways:

  • Element Selector: css=td
  • Text Selector: css=td:contains(“PHP 2,559.78”)
  • Class Selector: css=td.right-label

All three selectors will fail though. The first (element) selector will point the automated test case to the first td in the table, not the last. The second (text) selector will correctly refer the automated test to the desired element but will fail when there are two or more elements in the page with the same value; also, what if we want to get the value of the element assuming that they do not know its value yet? The third (class) selector will direct the test to the first td in the table with a right-label class, which in the page is the prepayment, not the balance payable.

In order to target specific page elements having the same attributes as other elements in the page, commonly found in tables, we need to combine selectors of different elements. To do this, we need to remember two things:

  • (to be used when an element selector and the succeeding element selector share the same parent selector)
  • (to be used when the succeeding element selector is a child of the preceding element selector)

Looking back at our example, we can see that our target element has a sibling (the td above it), as shown below:

Step3balanceCSS-a

And using this information, we can now modify our class selector (using +) and test it in Selenium IDE:

 css=td + td.right-label

This will, however, still point our test towards an incorrect element, and thus needs further modification. Let’s try adding the parent element (using >) above our desired element and do another test.

 css=tr.price-light > td + td.right-label

Our automated test now points us to the prepayment value. Close, but not quite. Lets do one more modification, adding the next tr element above our parent element, which is it’s sibling.

Step3balanceCSS-b

 css=tr.price-light + tr.price-light > td + td.right-label

Now, that works! 🙂

Using CSS Selectors to Target Webpage Elements (Part 1)

For Selenium IDE, locating page elements using CSS selectors is strongly recommended.

Let’s look at an example below. Using Firebug, inspecting the View rooms and prices button in the page shows us its location.

Step1ButtonCSS

As displayed, the location of the button is:

button id=”btnNext” class=”btn btn-primary btn-large translate enable”
View rooms and prices >>
/button

Using this, we can write in Selenium IDE the target element as any of the following:

    • Element Selector: css=button
    • Text Selector: css=button:contains(“View rooms and prices »”)
    • ID Selector: css=button#btnNext
    • Class Selector: css=button.btn.btn-primary.btn-large.translate.enable

Of these four, ID and Class selectors are more often used. Automation testers stray away from Element selectors because they easily break when there are multiple elements of the same type in the webpage. Text selectors, meanwhile, break when text inside elements changes according to requirements of the application.

Ingredients For Running A Selenium IDE Automated Test Case

We need three things:

Selenium IDE Installation Process:

  1. Download Selenium IDE by clicking the link above
  2. After the download, Firefox will ask the user if he/she wants to install the add-on now. Click Install Now1-Download_SeIDE
  3. After installation, Firefox will prompt for a browser restart 2-Download_Finished
  4. After restart, Selenium IDE should be available in the Tools section
    3-SeIDE_Location

Running a sample automated test case:

  1. Download the sample automated test case
  2. Open Selenium IDE in Firefox, either by clicking Selenium IDE in the Tools tab or by keyboard shortcut Ctrl Alt S4-SeIDE_Location
  3. Open the sample automated test case by going to the File tab, clicking Open, and selecting the downloaded file named SeIDE_automatedTestSample (which is a HTML file) 5-SeIDE_SampleTestScript
  4. Play the sample automated test case by either clicking the one of two Play icons in the IDE. This test case will redirect the user to Google and type and search the simple phrase “Sample automated test run via SeIDE, success!” 6-SeIDE_SampleTestScript_Play